Introduction
In the world of home decor, wallpaper can be a game-changer, but what happens when it’s time for a change itself? The art of wallpaper removal is an essential skill for homeowners looking to refresh their space. Let’s delve into the nitty-gritty of this process.
Understanding Your Canvas: Types of Wallpapers
Before we embark on the removal journey, it’s crucial to identify the type of wallpaper you’re dealing with. From traditional paper to vinyl and fabric-backed options, each demands a specific approach. Unveiling these nuances ensures a smooth removal process.
- Traditional Paper Wallpaper: The Old Guard
Traditional paper wallpapers are the pioneers in home decor. Discover the delicate touch required to bid them farewell without causing damage to the underlying surface.
- Vinyl Wallpaper: The Waterproof Challenge
Water-resistant and durable, vinyl wallpapers pose a unique challenge. Unravel the secrets to efficiently removing them while preserving your walls.
- Fabric-Backed Wallpaper: A Textured Farewell
Textured wallpapers add depth to a room, but removing them demands finesse. Learn the tricks to navigate through the fabric-backed challenge effortlessly.
Tools of the Trade: Essential Wallpaper Removal Equipment
Arming yourself with the right tools can make or break the wallpaper removal process. From scrapers to solvents, explore the arsenal that ensures efficiency without causing collateral damage.
- Wallpaper Scraper: Your Trusty Sidekick
The humble wallpaper scraper is the unsung hero of removal. Understand the correct technique and types to avoid unnecessary mishaps.
- Solvents and Steamers: Breaking the Adhesive Spell
Delve into the world of solvents and steamers, discovering their role in loosening stubborn adhesives. A comprehensive guide to choosing the right solution for your wallpaper type awaits.
Step-by-Step Guide: Mastering the Wallpaper Removal Process
Now that we’re equipped with knowledge, it’s time to dive into the step-by-step process. Follow these instructions to achieve a flawless wallpaper removal, irrespective of the type.
- Preparing the Space: A Clean Canvas Beckons
Before wielding your scraper, preparing the space is crucial. Learn the importance of protecting surfaces and creating an optimal working environment.
- Perforation Techniques: Paving the Way for Removal
Perforation is an underrated yet effective technique. Uncover the various methods to create perforations, making the wallpaper more receptive to removal.
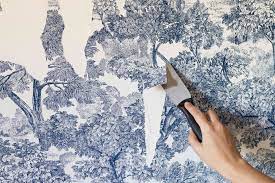
- Scraping with Precision: Technique Matters
Scraping isn’t just about brute force. Master the art of precision, ensuring efficient removal without causing damage to the wall.
- Dealing with Adhesive Residue: The Final Frontier
Even after the wallpaper is gone, adhesive residue lingers. Navigate this last hurdle with ease, leaving your walls ready for a fresh start.
Troubleshooting: Common Challenges and Solutions
No journey is without its bumps. Anticipate common challenges in the wallpaper removal process and discover foolproof solutions.
- Stubborn Corners and Edges: Tackling the Tough Spots
Corners and edges can be stubborn. Explore techniques to handle these tricky areas, ensuring a uniform removal across the entire wall.
- Layers of Wallpaper: Unraveling the Mystery
Encountering multiple layers? Fear not! Learn how to peel back the years without compromising the integrity of your walls.
- Damaged Drywall: Repairing the Aftermath
Accidents happen. When drywall sustains damage during removal, a quick repair guide can save the day. Discover the art of seamless fixes.
Conclusion: Transforming Walls, Transforming Spaces
As we conclude this journey through the art of wallpaper removal, remember that it’s not just about removing paper from walls; it’s about transforming spaces. Armed with knowledge and the right tools, you’re ready to embark on a makeover adventure.
Frequently Asked Questions (FAQs)
- Can I reuse wallpaper after removal?
Yes, depending on the type and condition, some wallpapers can be reused. Ensure they are intact and adhesive-free.
- How long does the wallpaper removal process take?
The duration varies based on factors like wallpaper type and wall condition. On average, it may take a day or two.
- Can I paint immediately after wallpaper removal?
It’s recommended to wait at least 24 hours after removal to allow the walls to dry completely before painting.
- Are there eco-friendly wallpaper removal options?
Yes, there are eco-friendly solvents and steamers available that minimize environmental impact.
Can professionals be hired for wallpaper removal?
Absolutely. Professionals can ensure a faster and more efficient removal process, especially for challenging wallpapers.